Crafty Blogs

Friday 27 March 2015

One-a-penny, two-a-penny, hot plush buns!

My regular readers will have noticed that Easter is my favourite time of year. From Easter baskets to knitted and felt daffodils I always find time to make something special when spring starts springing. This year I decided to make something food and Easter related, for people who love my food bags and purses as well as for everyone who enjoys following my tutorials. So with that I present - the hot plush bun!


This plush hot cross bun is made entirely from felt and decorated with fabric paint. It would make a quick and easy craft project for your Easter weekend. 

You will need:
Tan or beige felt
White or cream felt
Dark brown felt
Gold and dark brown fabric paint
Polyester toy stuffing


Cut out the pattern pieces from felt using the templates on the PDF above.

Next mix your fabric paint. I used a combination of Tulip brown fabric paint and metallic gold fabric paint to create that 'golden brown' toasted colour.
  

Stipple the fabric paint onto the top of your bun  (the larger of the two felt squares) with a paint brush and then use a tissue to blot and smudge the paint until you create an even layer. Work from the centre of the square out, decreasing the amount of paint as you go. This should create a 'toasted on top' effect. Leave the top for at least an hour to dry. 


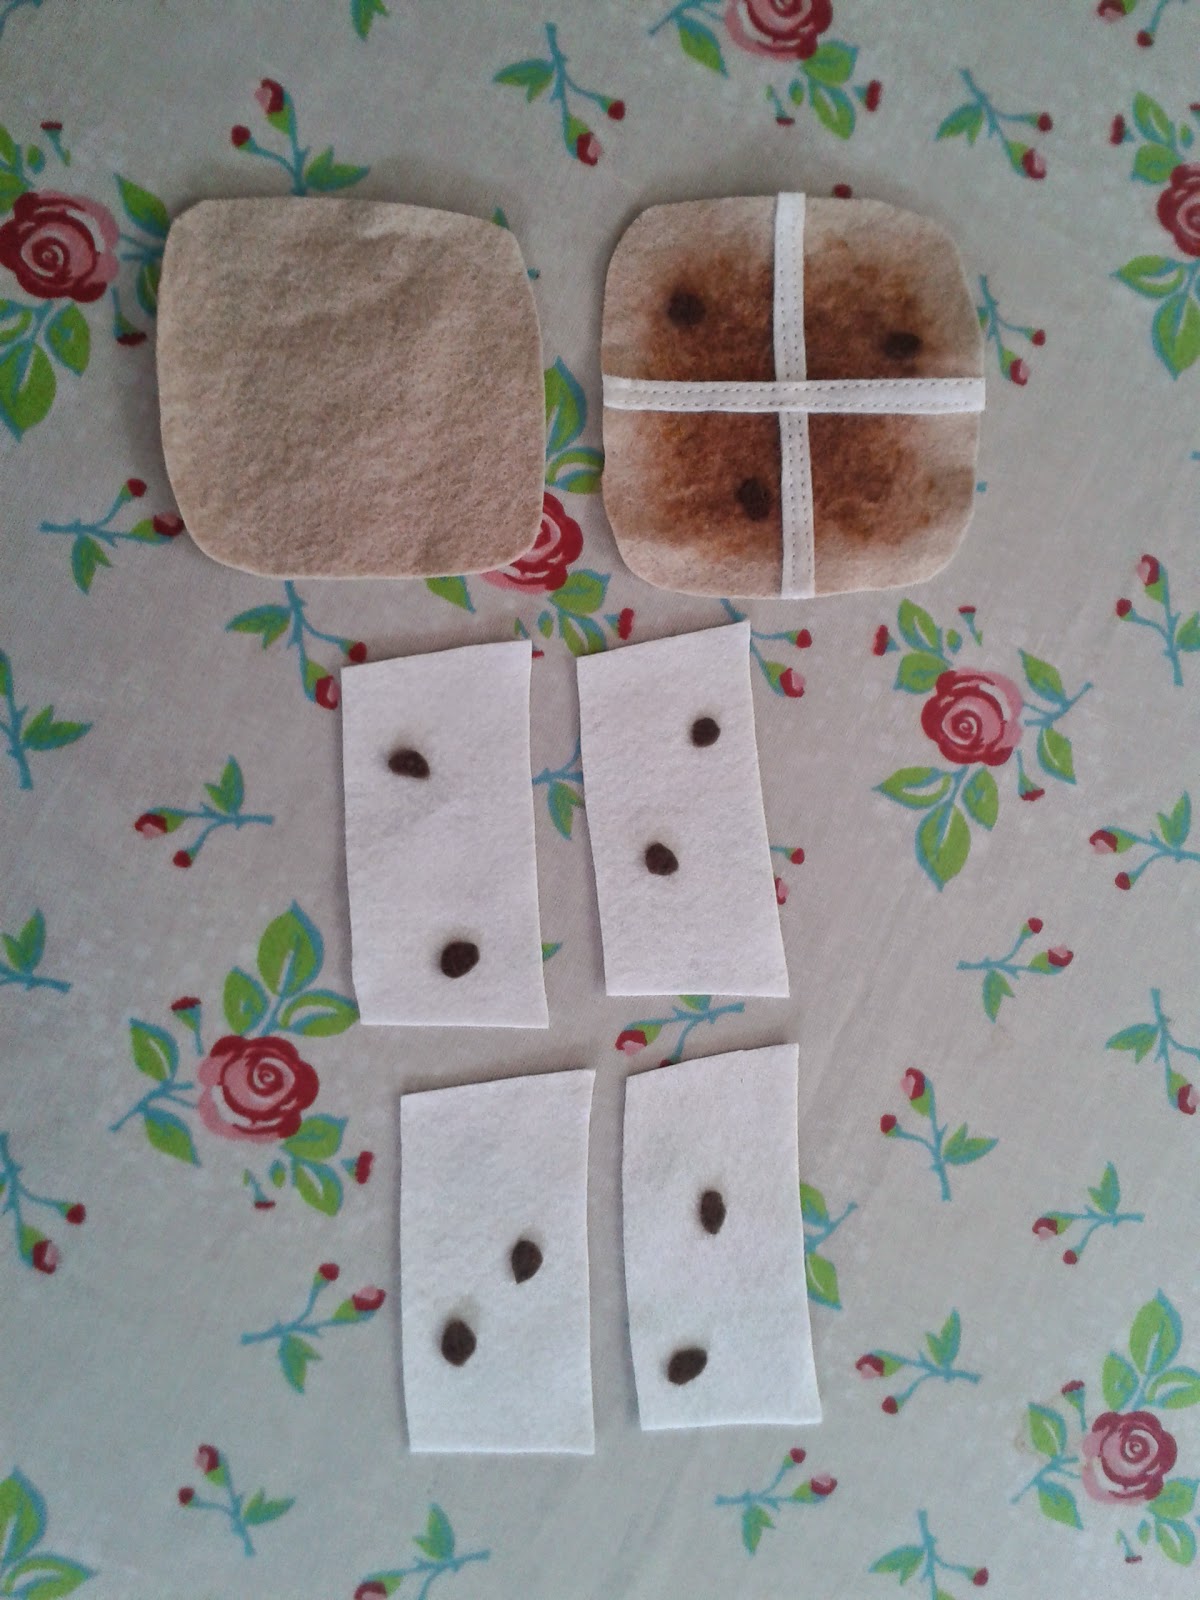
Create a cross for your bun with the two white felt strips. Machine or hand stitch them into position sewing as close to the edge of each strip as you can. Next add raisins. You can hand sew or glue these into place as above.

Lay the white side pieces in pairs face to face (raisins on the inside) and sew along the right side leaving half a centimetre seam allowance.


Open the paired side pieces up and sew them together on the left and right hand edges to create a square.

Open the square and pin the top, face down, into the opening. Sew around the top edge leaving half a centimetre seam allowance as before.

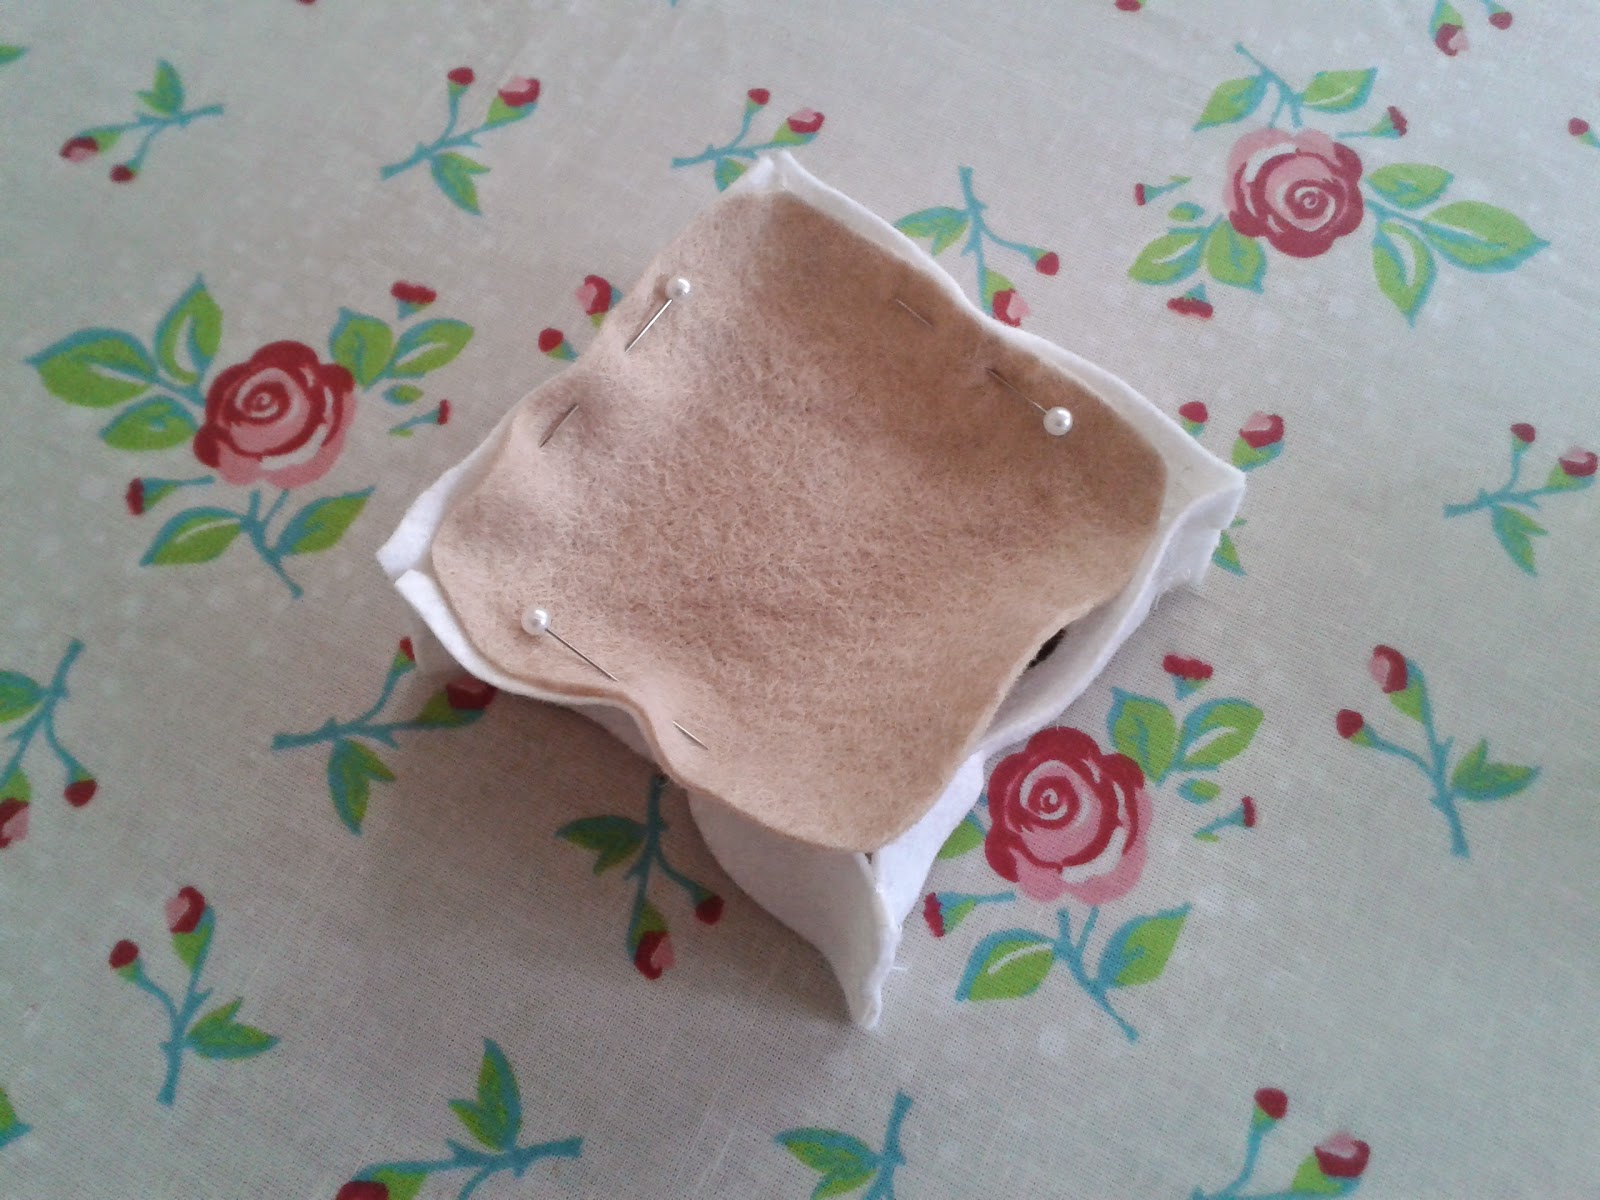
Pin the base of the bun into place as with the top, and sew around the top edge but this time leave one side open. Using this open seam turn the bun inside out. Stuff tightly with polyester toy stuffing.


Finally close the open seam by hand sewing the edges together using a ladder stitch. And you're done!

I hope you enjoyed this quick tutorial. Please let me know if you have any comments or questions. I'd love to see pictures if you make your own hot plush buns!
Have a great Easter, 

Lots of love and luck, 

LL xx

Thursday 19 March 2015

Lucky Dip Giveaway and Baby Madness Half Price Sale!


Would you like the chance to win some Lucky Ladybird handmade accessories for free? Of course you would! Every Friday in April 2015 I'll be giving away a lucky dip parcel. All you have to do to enter the prize draw is to like and share the weekly Facebook competition image. You can even enter your name into the draw twice if you tag a friend's name in the comments! The winner will be decided my random selection the following Monday. There are lots of prizes and lots of chances to win, so get along to the Facebook page and get entering! The first competition image will go live on Friday 3rd April.

But the bargains don't end there. To celebrate my upcoming maternity leave I will also be holding a 'baby madness' half price sale on my etsy store in April. For a limited time only you will be able to buy a Lucky Ladybird handmade gift set consisting of:
  • A Swiss Roll handbag (chocolate or strawberries and cream colours available)
  • A matching Swiss Roll purse
  • A mini bag charm
  • A few delicious sweets
The total retail price for this set would normally be £60, but all this will be available for only £29 (plus P+P)! Only a few of these sets are available, so check etsy listings to see if you can grab yourself a bargain!

Strawberries and cream gift set

Chocolate gift set
On sale for half price or less will also be my entire sushi collection. For the month of April only you'll be able to buy a sushi roll handbag for £20 rather than the original £40, a clutch bag for £7.50 instead of £15 and a sushi purse for only £5! The sushi items will also be on sale via my etsy store only, but make sure to keep checking in as I only have a few items and they're bound to vanish fast! The sale begins on April 1st.


I hope you'll help to spread the word about the lucky dip giveaway and the sale, it will all help me in my quest to make a little space in my house for the impending arrival. You can keep up to date throughout April on the Facebook page and the etsy shop.

Good luck, and happy bargain-hunting!

LL xx

Tuesday 3 March 2015

The wedding quilt - a work in progress


Back in the mists of time, three years ago, I got married. Because I'm a very crafty lady it was a very crafty wedding and with a lot of help from my friends we made a lot of the wedding decorations ourselves.This included collecting many colourful teapots, putting dinosaurs on sticks, arranging flowers and, most importantly of all, sewing miles and miles of bunting. Enough bunting to decorate two large function rooms, plus extra mini bunting to decorate the tables.
 
My beautiful friends making the bunting look good.
Teapots and dinosaurs on sticks (can you spot him?)


 I chose a selection of fabrics that would match with the colour theme of the wedding (red and white unless you hadn't guessed) along with two fabrics that were meant to represent me and my husband - a polka-dot ladybird fabric and a dinosaur-patterned fabric. I even ended up making us a ring pillow for the ceremony from the same selection of fabrics.


Our ring pillow, taken just before the ceremony.


On the day we gave away lots of the decorations as wedding favours, including lots of teapots, tea-caddies and teacups, but we were left with the miles and miles of bunting which we weren't entirely sure what to do with.That's when I came up with an over-ambitious plan. I decided that I would make a memory quilt from all the bunting flags. I worked out that I could cut the flags into equilateral triangles and arrange them in a patchwork hexagonal grid. I drew up my plan and set to work, and then, well, then lots of other things happened.


My diagram for the wedding quilt
 
Turning the flags into triangles with equal sides
 

I make good progress with the first few rows of triangles


Firstly I should say that this was my first ever quilting project, and wow did I really throw myself in the deep end. I will go on the record now to say that I would not recommend teaching yourself patchwork as you go along with a hexagonal-grid quilt rather than traditional squares. I managed to make the job even more difficult for myself my using a variety of fabrics, some of which turned out to be very unsuitable for machine sewing (I'm looking at you polka-dots!)
We also moved to a different part of the country a few months later, so the quilt and all the remaining fabric pieces were packed away and, I'm sorry to say, have been sitting rather forlornly in a bag in the corner of my sewing room ever since.


The wedding quilt as it is now

So this is the quilt at the moment. I only need to add two more rows of triangles to the bottom in order to finish the patchwork, but because it's so wide that's 60 triangles to be added. I also would like to add some applique to the centre of the large star to represent the wedding day once the patchwork is finished. I had started adding some embellishments to the centre of the smaller blue stars, but I will have to think about what else to include and where.

A dinosaur star with an owl in the middle. It sums up the wedding day surprisingly well


I recently inherited some fabric that should work perfectly as a backing for the quilt. I don't have any wadding yet, or any experience quilting through many layers of fabric, but I've got this far and I'm determined to learn what I need to finish it! So here is my plan. As of May I'm going to be on maternity leave, but although I'll no longer be running a craft business I'm certain I won't be able to keep my hands still or my sewing machine quiet. While I'm waiting for the baby to arrive, and possibly after the big day to prevent myself for going stir-crazy, I'm going to work on the quilt and get it finished.

Once Lucky Ladybird Craft is on hold (9th May, last orders taken 6th May) I'll still continue to post here and maintain this blog, so keep an eye out for more updates in 2015.

Wish me luck!

LL xx